Quick break from the kitchen storage and food prep series to talk about something that happened, or should I say finished happening today. I don’t bring this up to toot my own horn, but rather to celebrate a personal success in perseverance and planning. I hope it doesn’t come off as purely self congratulatory, as that is not my intention. There were certainly many “learning experiences” and frustrations before achieving this level of “planning zen.”
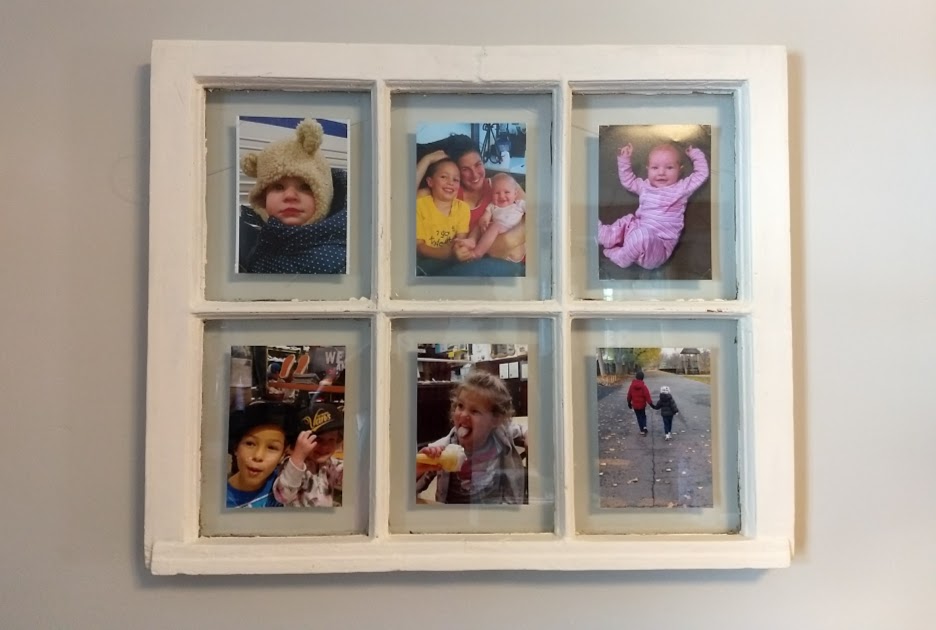
So… it all started in Milton MA in the fall/winter of 2014. When the original window from the 1927 house next door were being replaced, I got my hands on what turned out to be dozens of 6 and 4 pane window. I had a vision of turning them into picture frames for our house. But there were so many questions to answer to get them from crappy old windows to the image I had in my head. Such as…
- Do they have lead paint on them? How do I test for that? (Answer: home lead test kit and Yes, they do.)
- How do I get rid of the lead paint safely?
- Do I need to repair the windows first? (There are about 12 sub-questions about how to do that.)
- How do I attach the pictures?
- Do I mount them on the front of the back of the glass?
- How do I get the paint to look right?
- Is it worth spending the time taping the windows before painting?
- How do I secure the pictures to the glass in a non-permanent way?
- What size pictures should I use?
- Do I want to frost the glass around the pictures?
- Once I decide on the size of the pictures, how do I get my digital images to be that size?
- How to I hang the frame securely without being able to see a wire or a hook?
- How can I keep parallel to the wall if a hook is involved?
That’s a sample of the things that I needed to work through. I had plenty of time just thinking of solutions. I tried repairing the windows. That didn’t really work. I wasted a bit of time and money on that. But now I have a heat gun… if I ever need it again. Eventually I had the guys who painted our house strip 6 of them for me for $20 a window. I paid him before looking and he ended up breaking glass on 3 of them. But, I’m not even sure I need to strip them. A little light sanding (wearing a mask) should be fine. I’m going for a rustic look anyway.
I guess my point is that I did a few things that I don’t think I would have been able to do 10 years ago. I made sure the idea was “fully baked” before I moved forward to whatever the next step was. I definitely did some research on YouTube. (I learn by watching.) I was patient and didn’t put an arbitrary deadline. I asked people for advice. Maybe most importantly is that I didn’t get frustrated and give up when the first few things I tried didn’t work out. I put the project aside and continued to devote thought to how to solve the problems. And, eventually (roughly 53 months) I came out with exactly what I wanted. And, I got to explain what a prototype is to my son this morning. Now, my plan is to have three more finished by the end of the day tomorrow! Maybe I’ll even sell some on Etsy.
Standard Disclaimer: In an effort to foil my own perfectionist tendencies, I do not edit my posts much… if at all. Please and typos, mistakes, grammatical errors, or awkward phrasing. I focus on getting my content down. An imperfect post completed is better than a perfect post that goes unposted.
“